Friday, January 08, 2021

Christmas table runner will be for late 2021

I've decided that I'm just not feeling it to finish the Christmas table runner I started a few weeks ago. 

I had put one green border on it, and it made the other greens look dull. 

To the stash!

I found a good red fabric with poinsettias, and that's going to be really good. I think the green will still work as the binding, but after taking off one of those looong sides I don't feel like pushing on that project right now.


Last night as I was finishing cleaning the drum carder the band snapped. I had fused it once, and hopefully I'll be able to do it one more time, but it's getting super old and cracking so I decided to just bite the bullet and get a new one. 

I'll photograph the yarn I spun and plied this week later when there's good light:


Luckily Gillian's quilt was coming along very nicely! The goal was to have it finished by Saturday morning (it's currently Friday evening) so that she can take it with her for her third semester of college. I'm so proud of the way she's taken this project by the horns and run with it! She's done every bit of the sewing and cutting (except for four blocks for the borders that I cut).  We've faced reality and pushing to get it done before she leaves would be insane, so we'll ship it to her once it's finished.

Tuesday, January 05, 2021

Experiments with carding fiber

The drum carder has been calling to me, and I went a little crazy on the Paradise Fibers holiday sale. 
In preparation for getting some nice fiber (merino) I decided it was time to pull out the mystery fibers and play a bit.

I was going for a yarn that would be interesting, and I was hoping for something that would read as a purple-ish yarn. Time (or more accurately the spinning) will tell.

Here's the first layer of red:


Then some blue that came from the spinning guild, then some coral on top:


I also used some pink/orange Angelina-type sparkly stuff, and a tiny bit of a light tan wool.

Here I'm about to start dizzing off the wool to make a roving-type prep:


And a some-what accurate photo (in my computer chair) of the roving:


This is slightly too orang-y, but it's not a terrible representation; I'll take better pictures in the daylight.


On the piecing front, I put a border on my Christmas table runner but don't like the fabric with the pieces parts, so that's coming off. I cut it at 2.5" so it's still super usable. Now to dig through the stash for something better.

Gillian finished piecing the center of her throw!!! Now she's cutting the parts that came out of the second cuttings and we'll use those for a border. The goal is to have it done by the time she leaves for school on Saturday, and I have to admit that it's not looking good. It's still a possibility though.


Friday, December 25, 2020

Christmas catch-up post

I originally had this on my Twister Tool note to self post, but I wanted to pull it out separately.

Other things I've done over the past few weeks:


Made masks for the library commission group as a thank you from the staff association:


Gillian made kombucha (with my prodding):


I made a bunch of pop-up cards with Gillian's help, although I still need to send out three of them:


Took some photos of some neat frost-rimmed leaves out in front of my library when I was putting out signs one morning for our curbside services:


Thankfully there were no customers in the parking lot yet because I spent a few minutes staring a leaves and taking photos, and it probably looked really bizarre. (These were on the sidewalk in front of the building, so it wasn't like I was standing in the parking lot, although that *is* something I do as I'm inspecting the building, etc.)

Some paper village mantel decorations, using my Silhouette Cameo I got as a present from Greg a few years ago:


And here's the design wall in progress:


While we didn't get good photos of the conjunction of Saturn and Jupiter the other night, I did use Gillian's old telescope to take a photo of the moon with my phone's camera:


And to continue the randomness, I got a new set of nail dip powders and organized my existing stash, including updating my swatches (only five are new):


And then of course I had to try one of the new ones, so this is "Double Gleam" with "Snow Elves" as the gradient glitter:


Then, because I sometimes do things that make me question my own sanity, I decided that for this year's branch (work location) and neighbor gifts, bean soup mix would be perfect. We went to WinCo and got a ridiculous amount of beans and onion soup mix from the bulk area, and I went totally overboard.  The first photo is the beans we had leftover from making 37 packets, and the bottom photo is the little packets I made of onion soup mix with minced onions added in, which we'll use instead of the two-packs from Lipton, etc. that are twice the price of doing it myself:


And yesterday (Christmas Eve) Gillian decided to pull out a puzzle. We were able to finish it (500 pieces, not 1,000) this morning. Here's a photo of Ryan putting in the last piece, and Gillian cheering him on:


In other Christmas news, Ryan got a new set of keycaps (among other things) and promptly replaced the old ones:


Gillian got a pottery wheel, and both she and Greg took it for a spin, although we've misplaced the box of tools that came with it (Amazon to the rescue), and we still need to get an electrician out to add a 220 outlet in the garage for the kiln.


It'll take some practice, of course, but Gillian has had a great time with it so far. She will be in the "shitty pottery" stage for a while but I have no doubt she'll be throwing beautifully things pretty quickly! She and Greg really enjoy the technical sides of these arts, and I'm eager to see what she comes up with. 

Whew! That's enough of an update for now. I'm going to try to keep up with the blog more frequently (I know, I've said that before) because while Ravelry is great for spinning, knitting, etc., I'm getting back into quilting and I need a space to record that kind of thing.

notes on designing for the Twister Tool

 This post is mostly self serving, since I have messed up on calculating yardage for TWO quilts now:

Use the first piecing dimensions for the border calculations, not the finished size!!!!

On both the Christmas table runner and Gillian's Christmas gift quilt, I made the border calculations on the *finished* quilt size, which is 3/4 of the size of the *pieced* quilt size.

This is such a great technique, but the fact that I've made the same mistake twice means I need a reminder to myself.

So far I've made this small quilt to test the technique, and it turned out great! However, it was totally slapped together and I didn't actually plan it out.


Gillian's Christmas gift quilt, that she's doing the piecing for, is going to be fantastic once we get it done. Right now she's almost done sewing the rows together, although in the photo below it's in the planning stages.


I failed to purchase enough black flannel from Missouri Star Quilt Company (where the layer cakes came from), but hopefully the local quilt shop will have a comparable flannel we can use for the inner border that has to be added before we make the twister cuts.

Gillian's quilt started with 10" squares.

My Christmas table runner is on hold until tomorrow when we'll run to the local quilt shop and hopefully they will still have another yard left of the fabric since it's a bigger version of the blue-and-white one, where the background and border need to be the same fabric. It's ridiculous--the finished one will be around 120" x 12". 

In this photo it's in three sections, although I've since sewn the three sections together:


My table runner started with two charm packs (5" squares), then I cut too many background squares (also throwing off my calculations for the border fabric), but hopefully it will all work out.

Cross your fingers for us. :-)  

OH, I forgot to say anything about my new design wall!

I'm finally organized enough to be able to use a design wall (things are unpacked, the area is cleaned out enough to access a big enough wall space, etc.) although the room is not clean by any stretch of the imagination. I have a LOT of stuff that I need to organize in a better way, but I'm getting there. Creativity is messy, and making a mess is faster than cleaning it up.

Anyway, the design wall is two 8' x 4' sheets of 3/4" insulation, and I trimmed 13" off one side so that it wouldn't cover the power outlet at the bottom of the wall. 

Tuesday, December 01, 2020

Greg built me a closet shelf

 I'm trying to get caught up documenting some projects, so there may be a bunch of posts all at once practically.

I realized that while I document all of my spinning, knitting, and other fiber crafts on Ravelry I don't do such a good job on other things so I'm going to try to be better about that here.

To start, this is a project that I asked Greg to do and WOW did he deliver!

I wanted a shelf or two in the closet specifically for storing toilet paper and facial tissue since otherwise it gets buries in the closet.

Greg went way above and built this shelf and tissue box holder, while still giving space to store really tall things like the poles for my fake fire effect at Halloween.


That's space that was wasted before. The closet goes back under the stairs (the bottom of the shelf is where the other part of the closet goes under the stair landing) and that triangular space is wasted. 

On the opposite side of the closet we have some tools propped in the corner, so an upcoming project is going to be a rack to hang things like a Shark steam mop.

I absolutely love this shelf though! Now I can just pop into that closet and grab a pack of toilet paper or tissue box instead of having to unbury them in the closet. I'm so thrilled! Happy birthday to me! (I'd asked for something like this for my birthday in October, and then I got sick for two weeks.)

Christmas/holiday cards

 This year I'm getting my act together kind of (not really) early enough to get hand-made cards in the mail.

I fell in love with a Christmas tree pop-up die set, and so far I've got 20 cards assembled as far as the tree.

Here's a little forest last week:


(That's my amazing desk that Greg built! Better pictures when that area is a little more clean.)

Once the trees were done, the decorating could begin and that's the part that's taking me a bit longer. I've got nine cards finished as of yesterday.

You'll have to use your imagination as far as which insides go with which outsides. 


The remaining 11 will be variations of those, most likely. 

The rest of the cards I'll send out will be a combination of a less complex card design and some purchased cards.


Friday, March 15, 2019

Beware of restoration companies

It's been about a year and a half since a tiny hole in the plumbing in the concrete slab of our house caused about $45,000-worth of damage to the hand-scraped wood flooring and we spent two and a half months in a hotel.

Greg and I have been looking back and we have some thoughts and advice for anyone who might be going through a similar experience with a restoration company and insurance company.

I don't know if this will actually help anyone, but after a lot of back-and-forth we think it's worth putting this info out into the universe.


  1. Verify EVERYTHING the restoration company tells you with your insurance company.
    EVERYTHING. Do not take anything the restoration company tells you, *especially* not right after they first arrive. For example, the restoration company may tell you that if you have an "actual cash value" policy that you will get money back. That's actually insurance fraud and is very much against the law. You will NOT come out ahead with money left over. Even if the restoration company says you will.
  2. Verify the way your insurance company will pay for the repairs. Our insurance company would have paid any contractor directly instead of sending us a check and having us pay the restoration company. Had we known this, we would have done things very differently. ASK your insurance company how they want to handle the repairs. In our case, we found out about three-quarters of the way through the repair process that if we had used one of their approved flooring companies they would have paid them directly and we suspect the quality would have been higher. This avoids any favoritism/collusion between a restoration company and their brother-in-law/good friend, etc.
  3. You may be panicking when you realize that your house is going to be unlivable for the next month (or more) because you will have no kitchen or water until substantial repairs are made. They will tell you that they will take care of everything. They are NOT your saviors--they are there to make money and may or may not have your best interests at heart. You are in an emotionally vulnerable position and I strongly encourage you to let the restoration company handle the dry-out/mitigation, and then STOP.
  4. If you do choose to let the restoration company handle the repairs, make sure you know who they are subcontracting. I still think that a lot of the things we have problems with would have been fixed with some direct communication, rather than information being filtered--and filtered incorrectly--through the restoration company.
  5. ASK QUESTIONS. Breathe. Ask more questions. Assume nothing. Don't assume that you're both speaking the same language and ask for definitions of everything. (See "actual cash value" in item #1.)
  6. Give yourself some grace. As I said above, when something like this happens, your entire life is going to get more stressful. You may not be as rational as you would be at less stressful times in life, and your decision-making process may not be as solid.
  7. Any time someone tells you they're not liars or fraudsters, you can be assured they almost certainly are. That old line of Hamlet's, "the lady doth protest too much, methinks" remains relevant. 
Are we happy with the work that was done on our house? 

Eh, not really. Maybe 70% happy. Has it made us fall out of love with our house? Yeah, more than a little.

We're finally to the point that looking at the base of the staircase doesn't make us want to scream, which I'm calling progress. I still occasionally curse the restoration company for hiring the flooring company they did, and the flooring company for making assumptions that were 100% wrong and could have been eliminated if the restoration company hadn't lied to me about talking to the flooring company, and the flooring company had bothered to verify *anything* with me. (I have photographic evidence that it was NOT like that originally, and you messed up a big feature that I loved about the staircase.) 

Honestly, if we didn't like the neighbors to either side of us as much as we do, and if we were five years further along in our mortgage, we probably would have put the house on the market after this experience because it has left such a bad taste in our mouths. 

Hopefully you can benefit from our experience and avoid some of the pitfalls we got caught in.

If you have any question I'll do my best to answer them, but I'm not an attorney, I do not play one on TV, and all opinions are my own.

If you've read this far, thank you. If you're curious about the companies we're not happy with, the restoration company has bright green vehicles and the name starts with S, and I'm still not 100% sure who the flooring company was because the restoration company was less than forthright about it.

The service that I am 100% happy with, and would highly recommend if I knew who they were, is the group of guys that packed up our possessions on the ground floor, moved them to the storage pod in the driveway, and moved us back in. They did not break a single thing, treated our stuff with care, and were respectful. 

I wish I could say the same thing about the rest of the experience.

Saturday, October 21, 2017

Is this blog dead? Hmmm

I've not blogged much in the last few years. Facebook has made it incredibly easy to pop off about various things, but blogs haven't quite yet gone the way of the dinosaur.

I think I'll start posting here again, if only because it's easier to find things here than on Facebook once some time has passed. I'm going to keep it mostly to fiber crafts, although an occasional post about other things might pop up.

Things that have changed since I posted the last time:

  1. new house! We moved about a mile away from the old house, and after two years I'm still totally in love with this house and most of the neighbors. While the neighbors have dogs, they don't let them bark incessantly, they take care of their houses and yards, and some of them are even nice to socialize with! We've really lucked out with the ones to either side.
  2. new job! I'm now the assistant manager at one of the regional branches. I love it!
  3. new school situation! Last year I started on an MLIS, Masters of Library and Information Science. I hope to graduate in December of 2018. 
I'm still knitting, crocheting, spinning, etc. and enjoying it.
I entered three things in the fair and got a sweepstakes+first on some handspun yarn, a second place on my small shawl from handspun yarn (fiber from my sister), and nothing on my crocheted cowl (I wasn't expecting it to--it was nothing special, but I wanted to enter *something* in that category.)


So, not bad!

Now the challenge is going to be to continue to post here. Now that they've improved the method for adding photos, it's more likely to happen.

Friday, August 30, 2013

Closing Pieceful Stitches

After a lot of soul searching and evaluation, I've decided to stop quilting for other people.

I got a fantastic new job in February that grew into a full-time job, and I just can't juggle full-time work, family, AND quilting, so something had to go.

I've still got some customer quilts to finish up, but it's taking me a looong time since my free time has become somewhat more rare.

I'll try to keep up more with this poor neglected blog, but we'll see--it may soon become filled with library and bookmobile posts instead of crafting posts!

Tuesday, May 08, 2012

Cleaning!

This is going to be a picture-less post, but I just have to rave about the cleaning solution I used the other day.
(No, I'm NOT trying to sell you anything, I just have to pass on this cheap and easy thing that's going to make my life slightly easier.)

I'd been reading on Pinterest—an amazing time suck and fantastic inspiration, all wrapped up in one—about a cleaner for showers/tubs using just an equal portion of Dawn dish washing soap and hot vinegar. I'd seen enough people rave about it that I figured it would be worth a try, and I wouldn't be out anything since I already had that stuff on hand.

IT'S AMAZING. My shower hasn't been that clean for a long time, and I didn't have to expend anywhere near as much energy as I usually do.

I put 1 cup of vinegar in a spray bottle and microwaved it until it was hot (one minute in my microwave--I was kind of worried about melting the bottle but it was fine). Then I added one cup of blue Dawn dish washing soap and shook it. Then I sprayed it all over my shower and let it sit for a while. The smell of the vinegar kind of made me cough a bit, but it wasn't any worse than Scrubbing Bubbles or similar things.

After letting it sit, I scrubbed it with a scrub brush, but not as much as I normally do with other things like Soft Scrub. I let it sit for a little longer, then hosed it down with the shower head (YAY for removable shower heads!) and gave it one more pass with a scrub brush.

I'm so impressed with how shiny everything is!

I also used it on the sink faucet and it looks like new.

I think I'll be doing this every few weeks to keep things sparkly and clean. Cleaning the shower won't be an hour-plus project any more. Yay!

RECIPE:
Heat one part vinegar until just under boiling.
Pour into a spray bottle.
Add one part Dawn dish soap and shake.
Spray on surfaces to be cleaned and let them sit for a while (an hour is good).
Scrub, then rinse. Enjoy the shiny!

I used one cup of each and it was enough to do both the tub in the kids' bathroom and the shower stall in the master bath, plus the sinks/faucets in both bathrooms. Next time I might just do half a cup of each.

Tuesday, April 24, 2012

Look out, it's a partial catch-up post...

How the heck have six months gone by without a blog post? Shesh!

While it seems like it's just been day-to-day life stuff going on, I have managed to get some creative projects finished. I've been doing a fair bit of quilting for others, but for this post I'm going to focus on things I've done for myself.

Starting with the most recent craft: weaving! My Mom gave me her Northfield Tia rigid heddle loom, and I've really been enjoying it. So far I've woven 11 washcloths (pathetically small, but it was great practice) using some hemp/cotton yarn that's been languishing in my stash. I also made a hounds tooth scarf that I'm ridiculously pleased with.


Earlier this month I pulled out my spinning wheel for my monthly hour or so of spinning. (I haven't been focusing on the wheel much, unfortunately!) This is some roving that I bought at least three years ago. I've got to spin up more of what I've got before Fiber Christmas in July, when I know at least a few new rovings will want to come home with me.


I've been fairly good about finishing knitting projects, so here's a roundup of the last six or so months, in no particular order.

I tested a neat crocheted headband pattern, and ended up with this lovely item:

The pattern is available here on Ravelry (it's not mine).

Also on the handspun front, I *finally* finished my Bono Kimono, using my hanspun and hand-dyed yarn:


I'm thinking about putting a zipper in it. We'll see. This is a project that sat for about a year and a half while I decided if I wanted to rip out about a third of it and re-do the sleeve/body proportions. I'm so glad I did! Instead of the sleeves and side triangles being the same size, I made the side triangles each 2" wider, which took 4" total from each sleeve.

The next finished item is this Whippoorwill Shawl (Ravelry link), using yarn that I dyed while we were in Idaho over the summer. The grey is KnitPicks non-superwash Bare fingering-weight yarn, dyed with Jacquard black (which broke just beautifully!). The orange is KnitPicks Gloss fingering-weight yarn in pumpkin, overdyed with black.


Here's another test knit, Blue Hour Gloves:

I dyed the pink and blue yarns. All of it is Palette from KnitPicks. I really enjoyed making these, which surprised me--last time I did partial-fingered gloves I thought they were incredibly fiddly. Of course the fingers *are* fiddly, but I'm so in love with these it's not even funny. I see more hand-knit gloves in my future.

Here's another quick test-knit that I did, Scally's Cap. Are you noticing a trend with test knitting? I love it because there's a deadline (which I've established that I desperately need or I get craft ADD) and I get the pattern for free.


These beautiful cuffs are from a pattern by Sivia Harding. She came for a workshop with the knitting guild, and I had such a good time with her! She stayed with me and I'm happy to report that she's just as amazing in person as she seems on the internet. The cuffs below are her Aquitaine Cuffs, and I swear I wore them every day until the weather got warm enough that I couldn't stand to wear them any more. The yarn is 80% alpaca, 20% silk that I won at Fiber Christmas as least four years ago. 


 Here's (yet another) test knit:

Those are Scullers Socks, and as you can see the gusset decreases are on the bottom of the foot. These were fun to make!


Still another test knit, here's my Contrast and Complement shawl:

It's a big shawl, and I used acrylic yarn so that I can machine wash and dry it.

I didn't manage to get a finished project picture of this, but it was pretty spectacular and I'm going to have to make one for myself.  The pattern is the Garter Stripe Squares bag on Ravelry.


I've got a LOT of pictures of this next project because I'm so darn pleased with it.
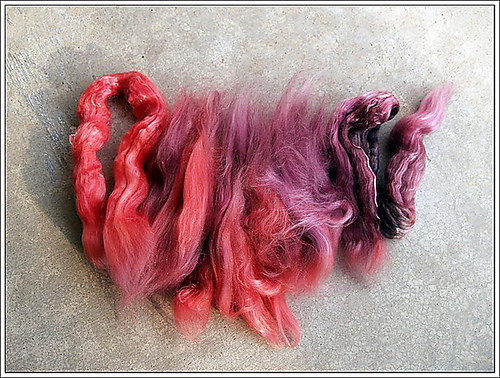
I won the roving from Woolgatherings during the 2010 Tour de Fleece on Ravelry.


I separated out the different colors and spun it up as a progression, then chain-plied the singles.


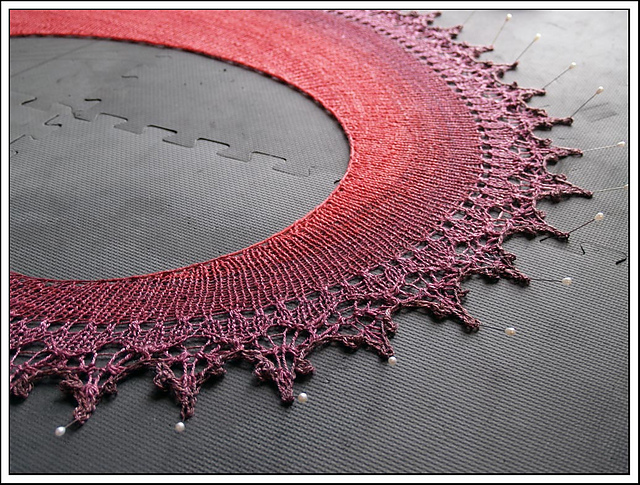
My lovely friend Calista bought me the pattern, Lazy Katy, and away I went!  :-)
The color is really hard to capture, but that last picture is the most accurate. I re-designed the lace border since I didn't have quite enough of my handspun, and ended up with about 6 yards left over.

Both of the pictures blow were taken as it's blocking.


And to stop for the moment, here's a sock (I made a pair, just didn't photograph both) that I test knit. It's a mosaic pattern, which means you're never working with more than one color of yarn per round. It was quite fun!


One last picture! This is from the Gilcrease Museum gardens. When my parents were here in April, we went to the Gilcrease and the Philbrook, and of course since it was the first week in April all of the azaleas were absolutely spectacular. Don't you think?