
Begin as you usually would, casting on the necessary number of stitches. In this case, I cast on 20.
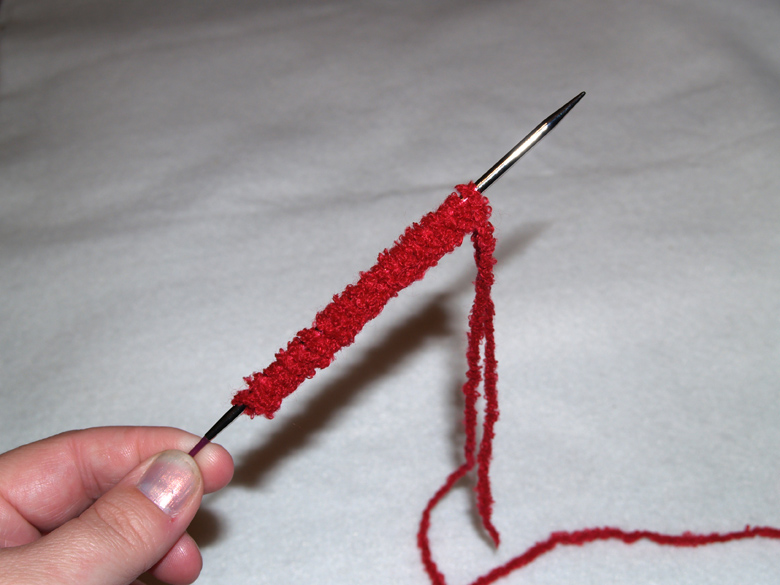
Next, move the stitches down onto the cable and pull out a loop of cable at approximately the half-way point. I cast on 20 stitches then pulled out the loop between the 10th and 11th stitches.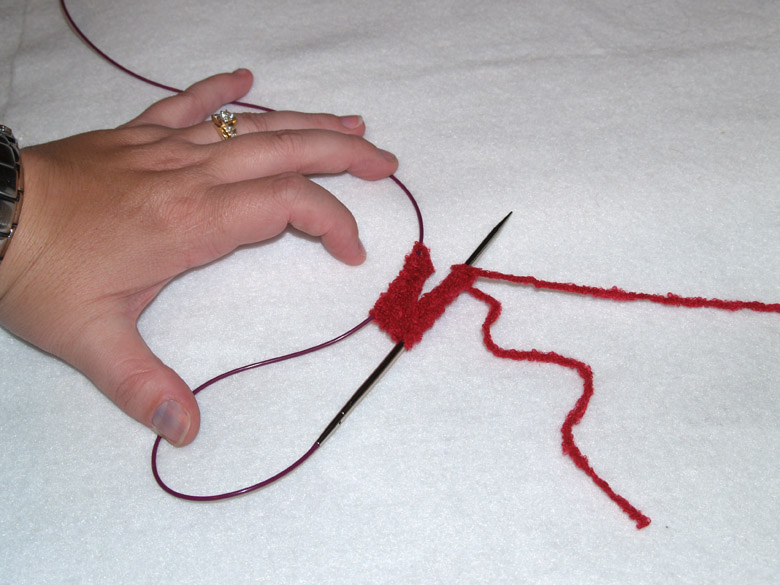
Next, slide the stitches up so that both needles have loops on them. Note that the working yarn is coming from the right needle.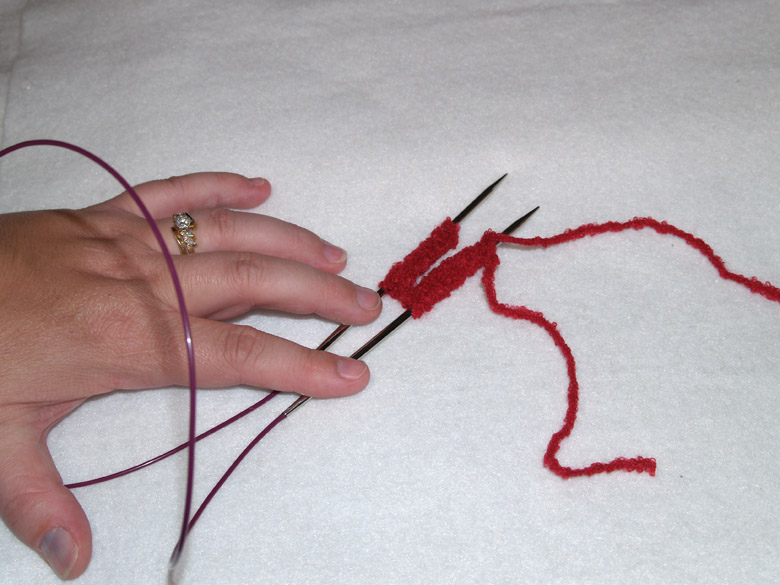
Now pull the right needle up so that the stitches are on the cable. You're now in working position. Bring the yarn up and begin knitting, using the stitches on the left needle tip.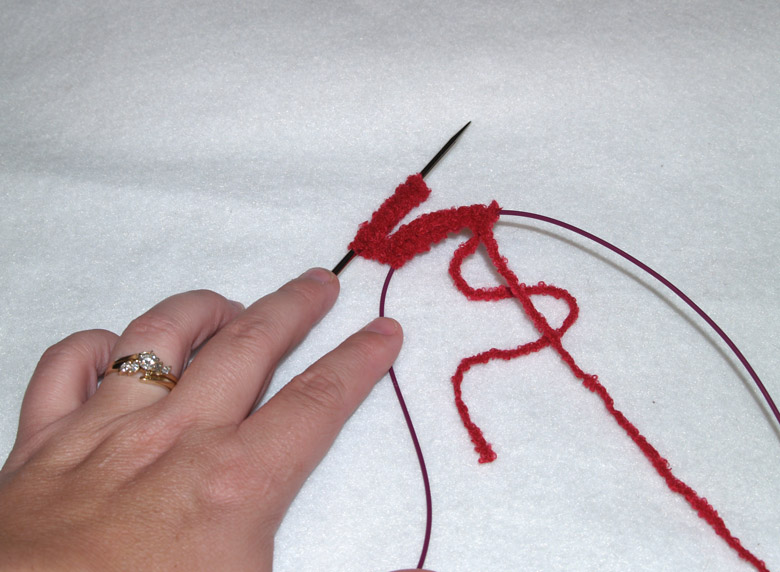
Here I've worked four stitches, and you can see the loops (I like to think of them as ears, for some strange reason) on either side of the work.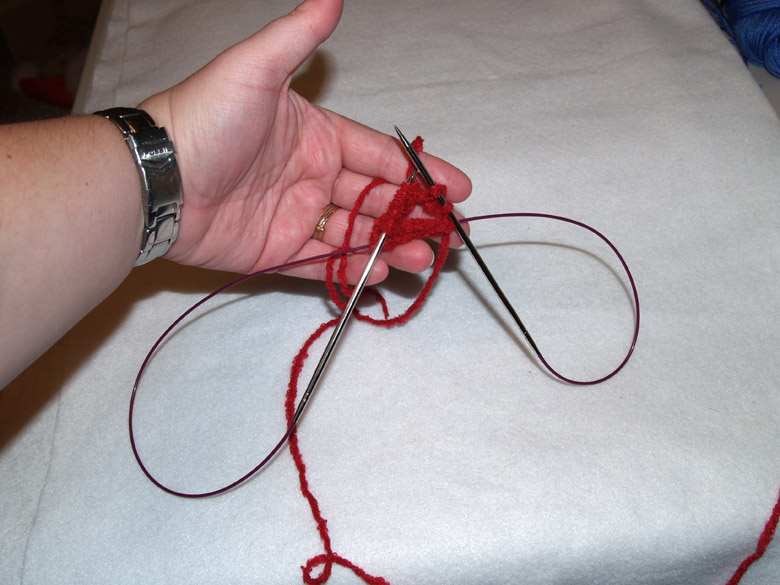
At this point I've finished working the stitches on the left needle, and now I need to bring the needles back into working position.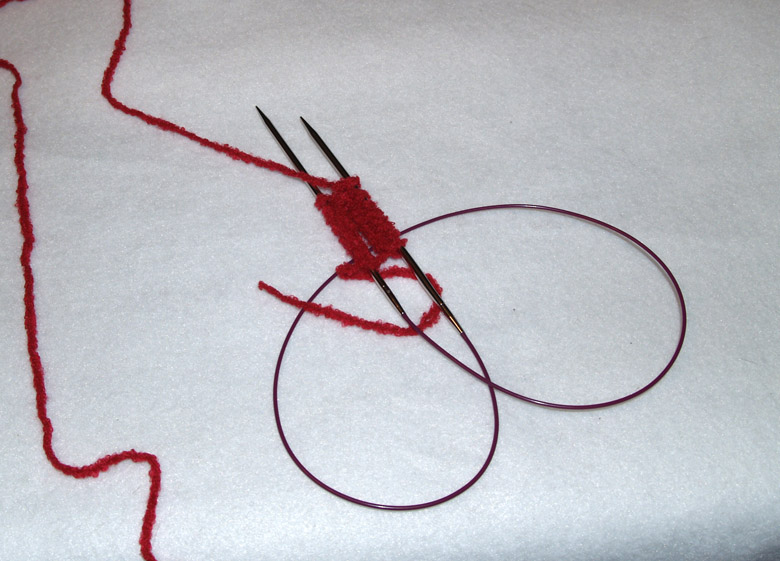
I'll bring the right needle tip up and out of the stitches so that they're on the cable...
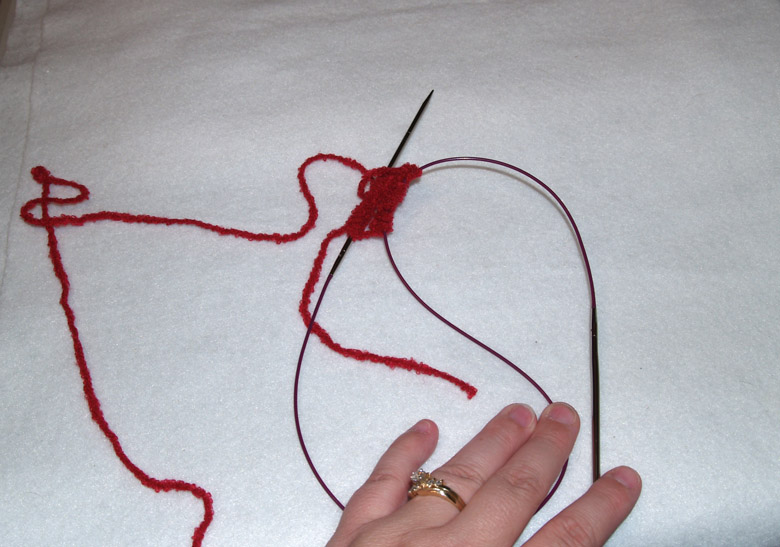
Then bring the tip of the right needle back up into working position. You can see the loop forming on the right side.
On a not-really-related subject, I've been having fun with my Diagonal Rib Hat (see sidebar for pattern). As the pattern progresses, the stitch marker—and the beginning of the round—move one stitch to the left every other round. So although the actual knitting doesn't change its position on the needles, the marker moves around. I took a picture, because for some reason this amuses me. [I know, I know, no comments from the peanut gallery, please. Those of you who know me will realize I am very easily amused.]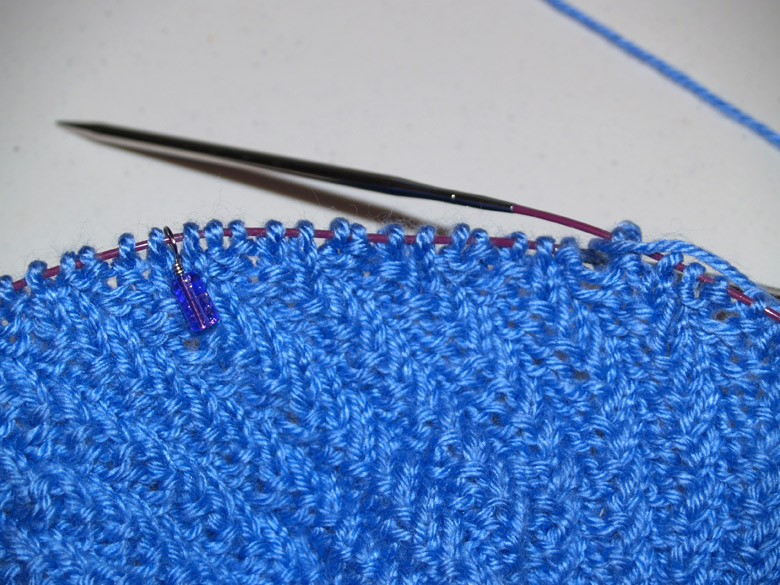 The needle is at the original start of the round, so you can see how the stitch marker has moved with each pattern repeat. For those of you with a fair bit of knitting experience, you're probably going "huh? WHY is this a big deal?" but I thought it might throw some beginners and was worth mentioning.
And here are two pictures of the magic loop in action on my latest Diagonal Rib hat: After finishing the stitches on the left needle (above), and starting the next half of the round (below).
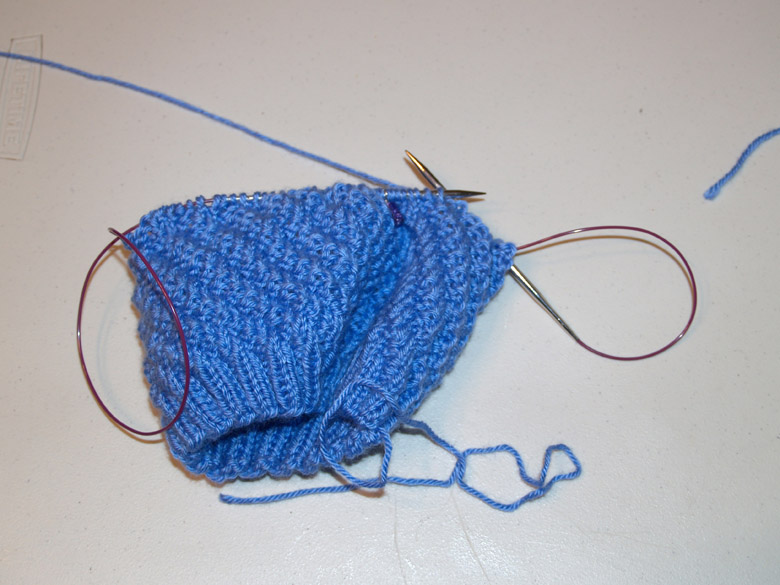 Hopefully someone will find this helpful!
We're nearing the end of the bathroom project. Today we hung towel bars, which was quite exciting! ROFL
Here's a picture of the medicine cabinet installed. It was totally bizarre to walk in there and not have a mirror. I kept thinking my eyes were wonky.
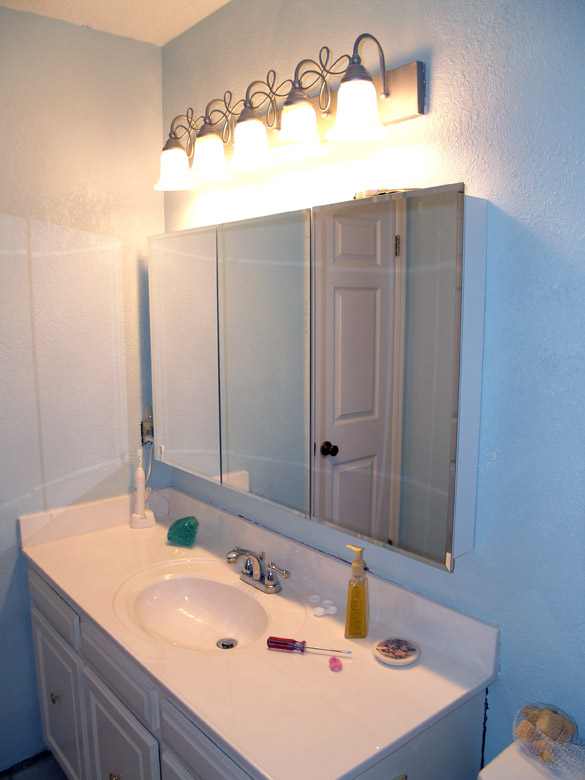 Please ignore the little bits of burgundy around the vanity. Those are going to go away. Very soon. That's the old paint color. If you can imagine, the LIGHT FIXTURE HAD BEEN PAINTED BURGUNDY when we moved in!!! The previous owners really should not have been allowed near paint. I took down the light and got some really nifty "hammered metal" spray paint. Poof! Burgundy light fixture gone! That stuff is way awesome. We also used it on some old hinges in the other bathroom and so far they've held up pretty well.
So now all we have to do is get new baseboard, paint it, install it, do some touch-up painting, fix two broken tiles on the floor, and install some crown molding. And then those of you who are tired of reading about my bathroom remodel won't have to be in agony any more. ;-)
1 comment:
Hi,
Thanks so much for your help on the magic loop.
Thanks for the free patterns too.
I downloaded them.
Post a Comment